

In this series I will be comparing the developer experience of React Native and the low code platform Outsystems. We've made a demo app in Reactive Native now we will build the same sample app in Outsystems. A low code development tool which supports both mobile and web applications. Building the app in both tools gives you a chance to compare the developer experience. After building the app, we will test the functionality. This can either be done on web or your own mobile phone.
This series consists of 3 blog items. In this second part I will show you how to implement some functionality in a demo app. This will be done in Outsystems' Service Studio IDE. This second tutorial can be done without the first part, but feel free to read it!
The goal
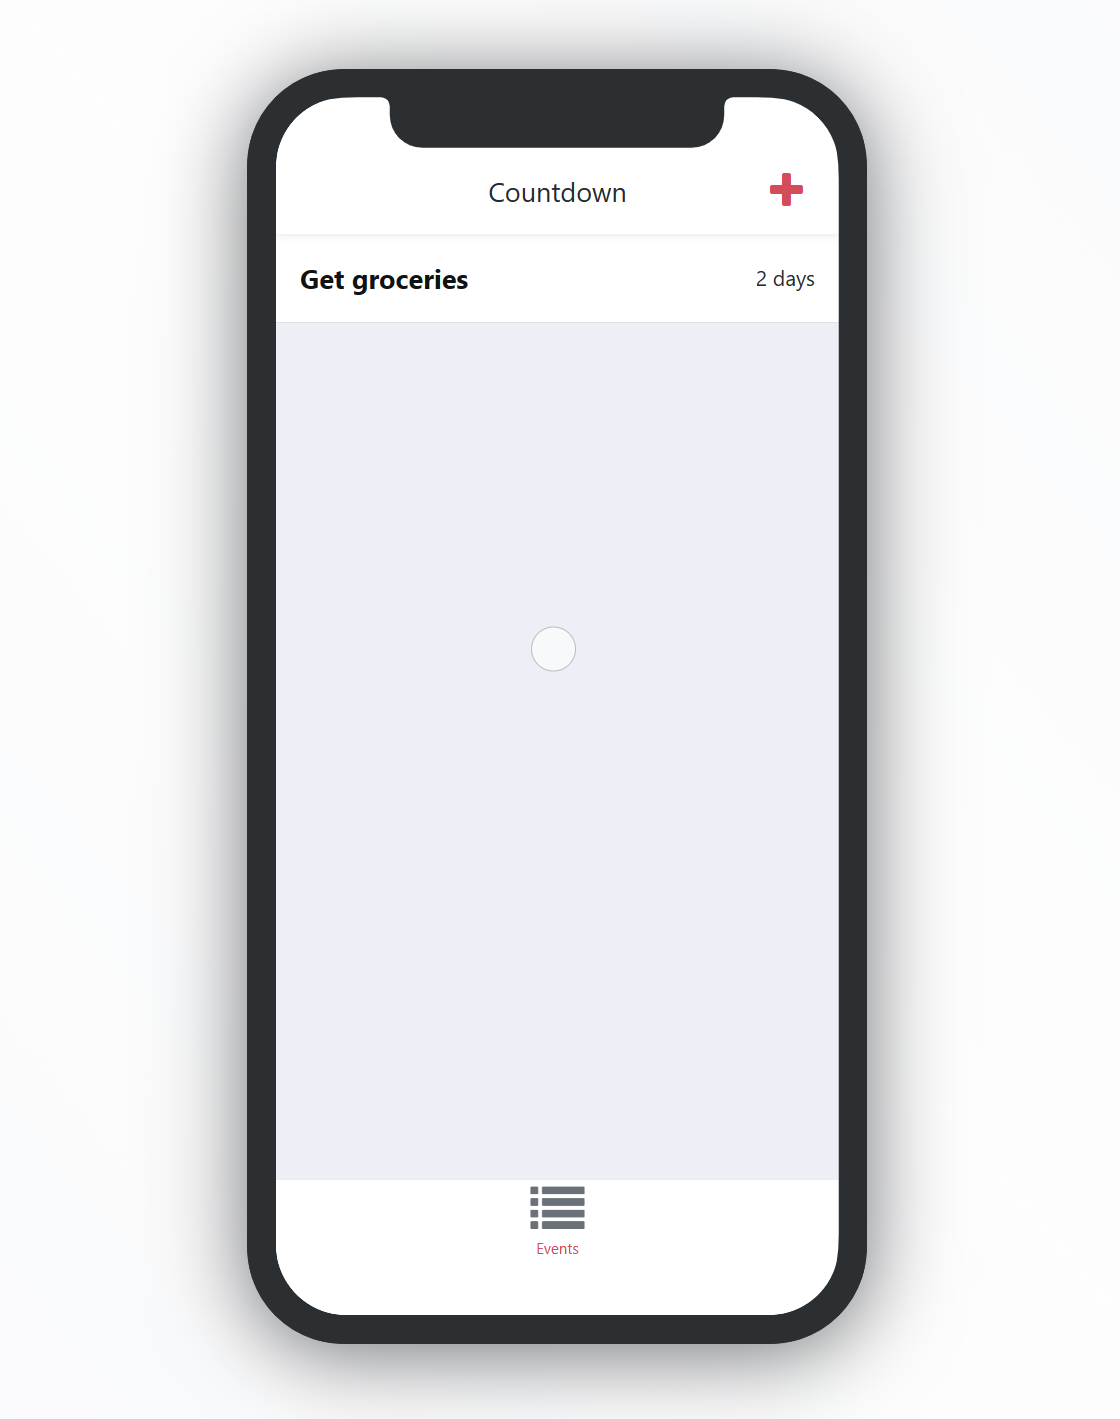
In this second part we'll build an app similar to the first part of this series. The goal is to build a simple count down app, which will display a list of events. This was inspired by CodeMentor's dev project. There will be visual difference, but the functionality will be the same.
In this tutorial, we'll be creating a PWA. This enables easier deployment compared to a native app. Outsystems is able build native applications based on React Native, but in most cases a PWA makes more sense.
Getting started
Before we start to develop in Outsystems, you will need to follow this guide. It will help you create an account and download the required tool to start developing. The IDE Outsystems uses is Service Studio, in which you can create screens, logic and other parts of your application. It is where most of your development will take place.
To kickstart the creation of your application, I've created this boilerplate. Download and double-click it. That will open Service Studio and install your app.
Retrieving data from local database
We start with creating the most basic functionality of your application: displaying data. On mobile, Outsystems uses your local storage to save your data. Retrieving that data is quite easy using Aggregates. Aggregates provide you a visual way of writing queries on your local storage.
Open the EventDetail screen in Service studio and right click. That will present you with the following options:
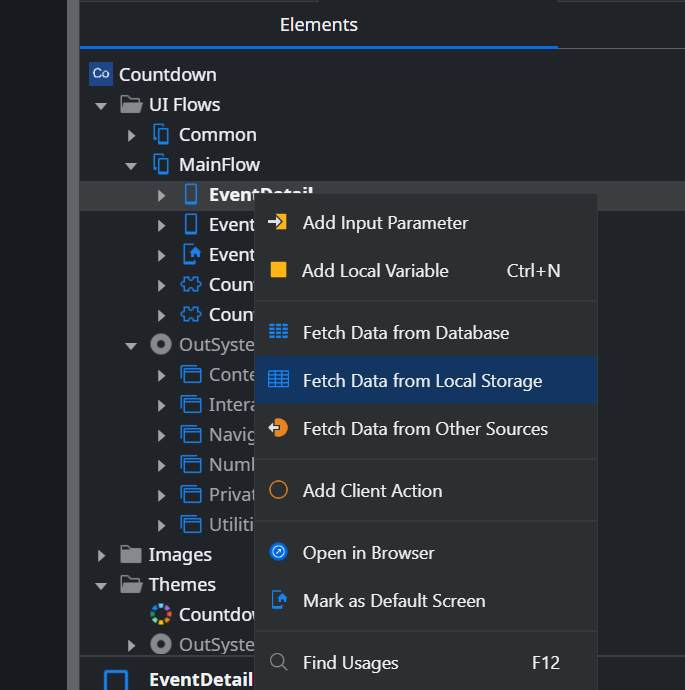
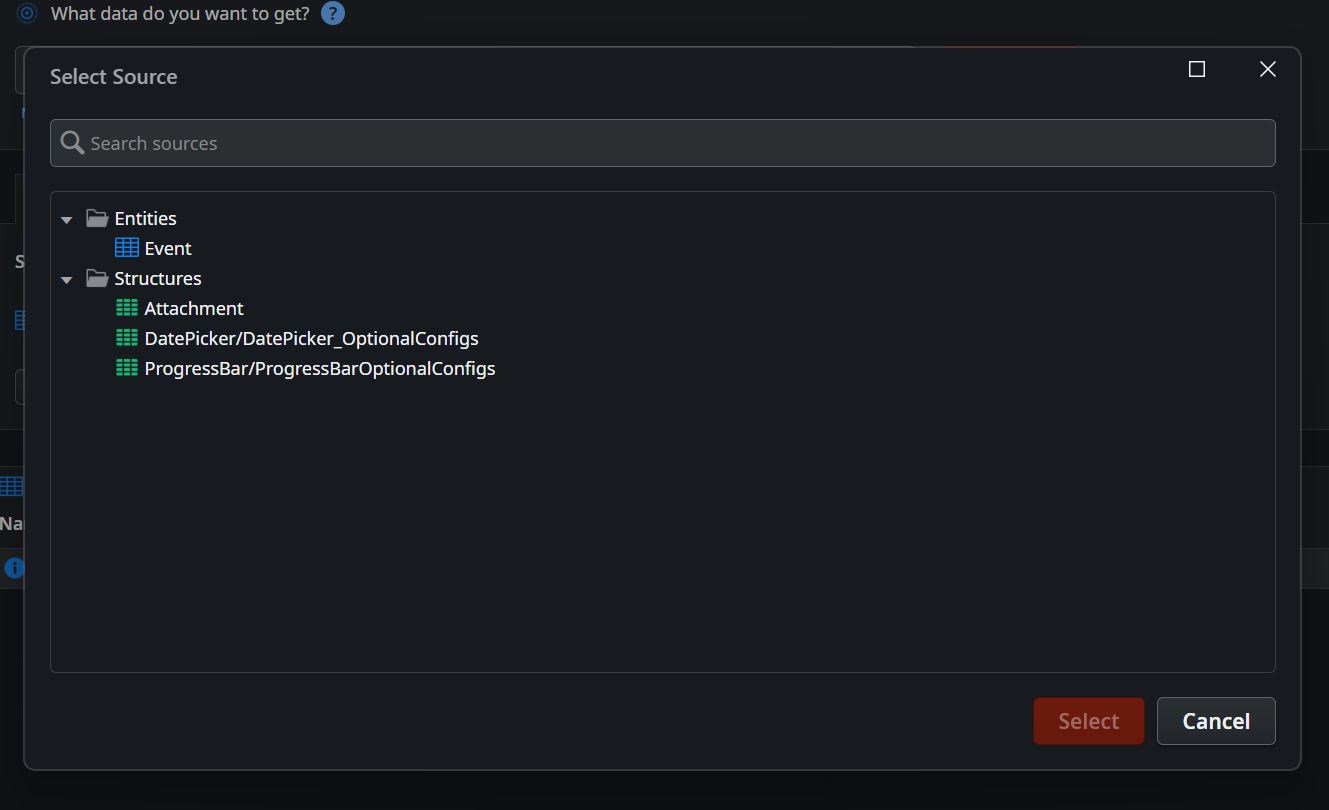
Click Fetch data from Local Storage. That will create an aggregate on your screen. Click Add Source and select Event.
Click on the Widget Tree tab to view your screen elements in a tree view. Find the CountDownHeader web block. When you click on this web block, it's details are shown in the right-down corner. Click on the DateTime input parameter and change its value to GetEventById.List.Current.Event.DateTime.
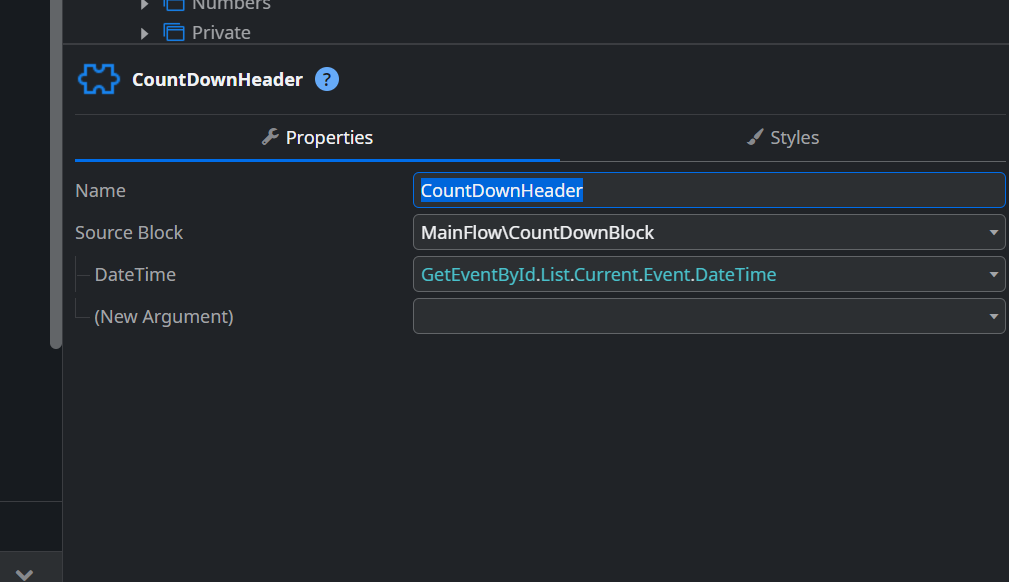
That will pass down the retrieved data to the CountDownHeader web block. Further on in this tutorial, we will implement a pretty format function to display a more friendly date time format.
Handling user input using forms
In order to create new count down records, I've created the EventEdit screen. This screen contains a form to edit and create count down records. We will implement a date picker in this form.
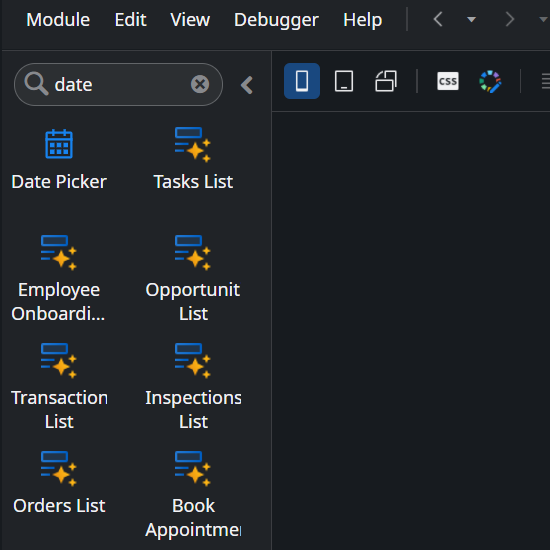
In the Widgets list on the right, search for date. Drag and drop this date picker widget in the Ctn_InputDatePicker container.
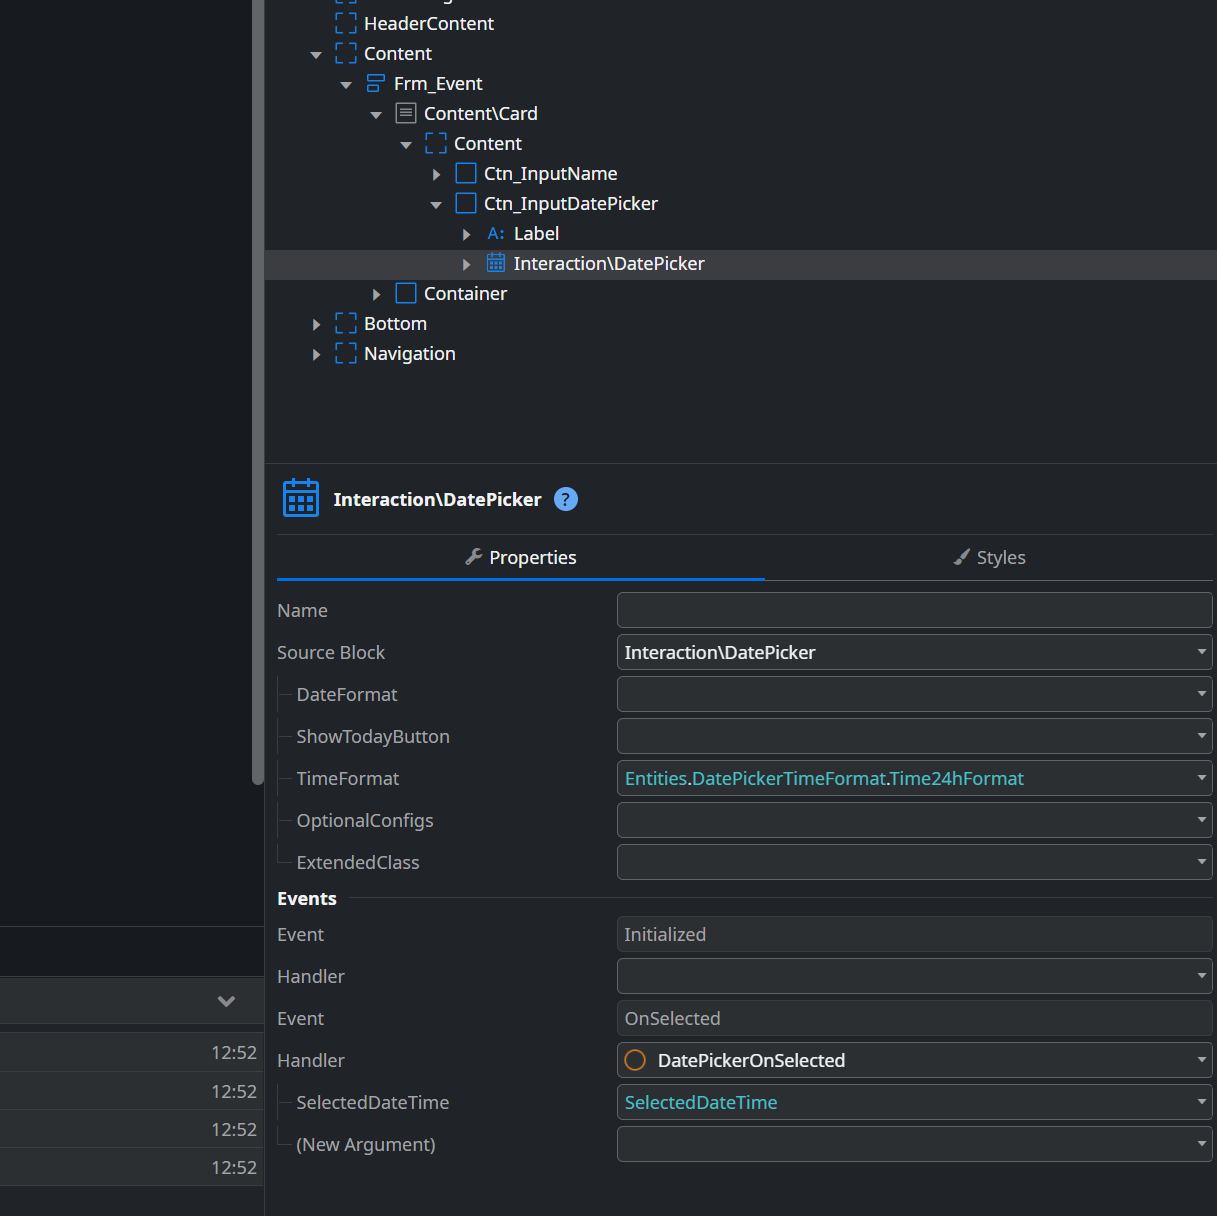
The date picker pattern requires a date variable and a Selected event handler. Go ahead and click the Input1 input that has been created. As variable select GetEventById.List.Current.Event.DateTime. That will bind the data retrieved from the database with your input.
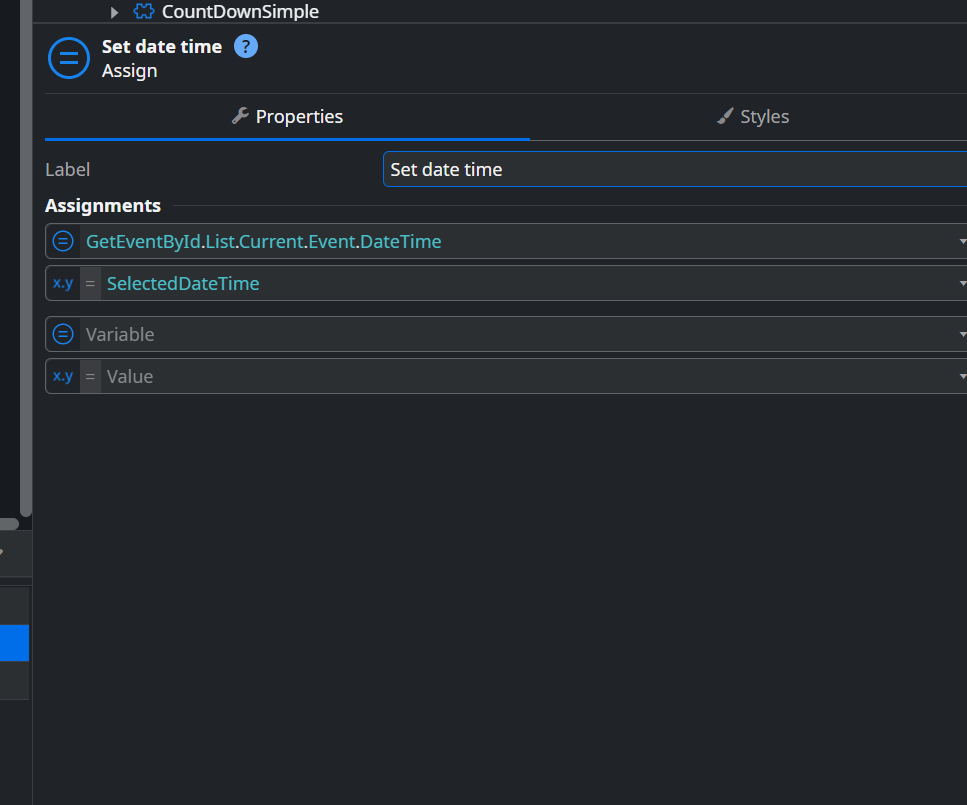
Now we need to implement an event handler to update a selected date. Click New Client Action.

In your new event handler, add an assign. Assign GetEventById.List.Current.Event.DateTime to SelectedDateTime.
Delete items from our local database
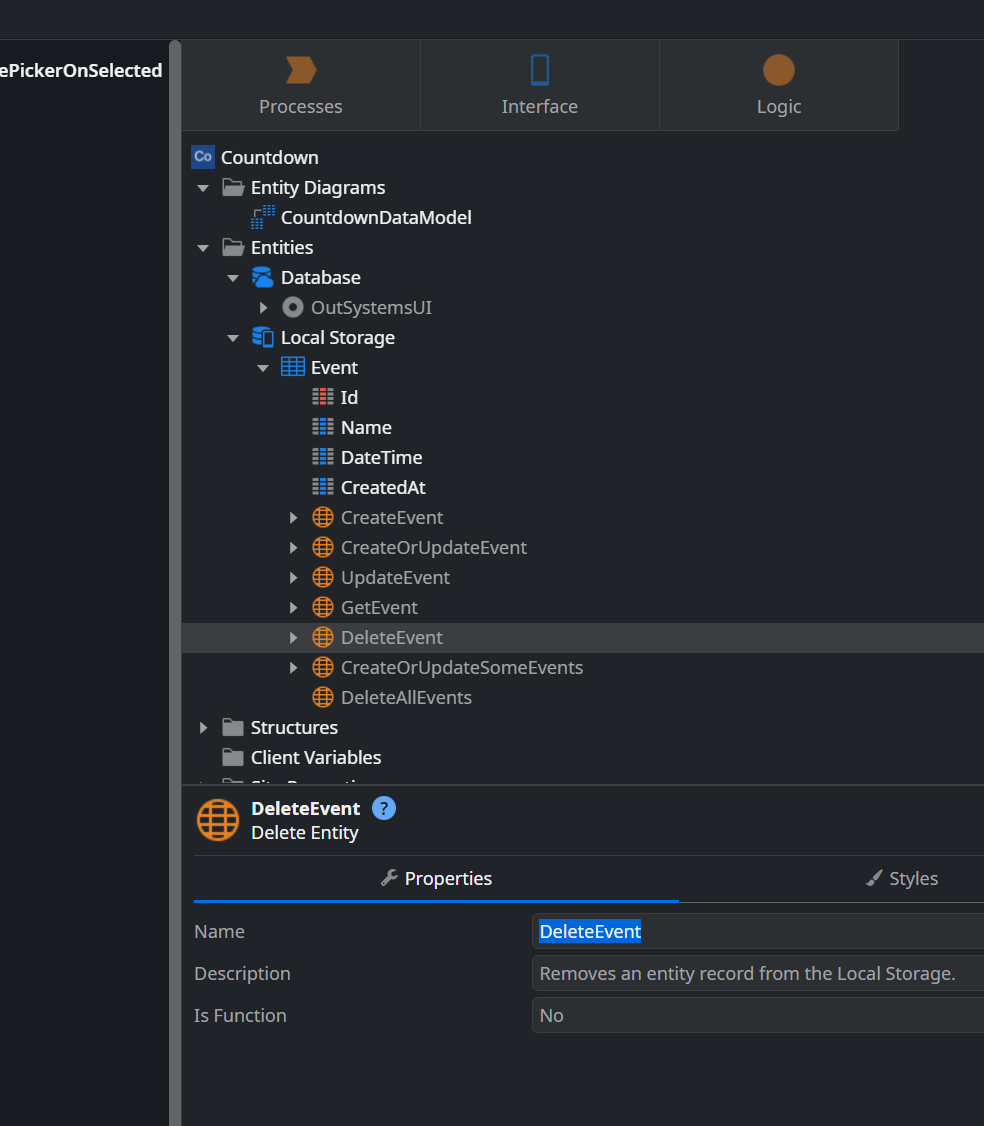
Outsystems provides built-in database actions. You can use these to manipulate data in your local database. In the Logic tab create an client action called Event_Delete. Add an EventId input parameter. Outsystems should automatically set it's type to Event identifier. If not, change it accordingly. From the Data tab, drag the Delete action to the new delete wrapper.
Implementing a new library
Outsystems provides multiple ways to extend your logic beyond your platform. The easiest way is by downloading a plugin from the Forge. Click the Forge tab and search for Date pretty format. Download the DateTime_PrettyFormat plugin. In your Count down app, open Manage references. Search for the 'DateTime_PrettyFormat' module and select the action with the same name. Now you've referenced it, you can use it in your logic and screens. Go to the CountDownSimple web block and drag an Expression in the False branch of IsExpired. In the expression editor, type the following expression DateTime_PrettyFormat(DateTime).
Testing the app
Click the One-Click Publish button to upload your changes. When your application is published, it turns into "Open in browser". Clicking it will open Device Preview, where you can test a preview in the browser. You've now successfully developed your first Outsystems app! Quite easy right?